📱 Adding of an Expense
The mobile app makes it quick and simple to record expenses wherever you are.
Steps to Add a New Expense
-
Open the App
-
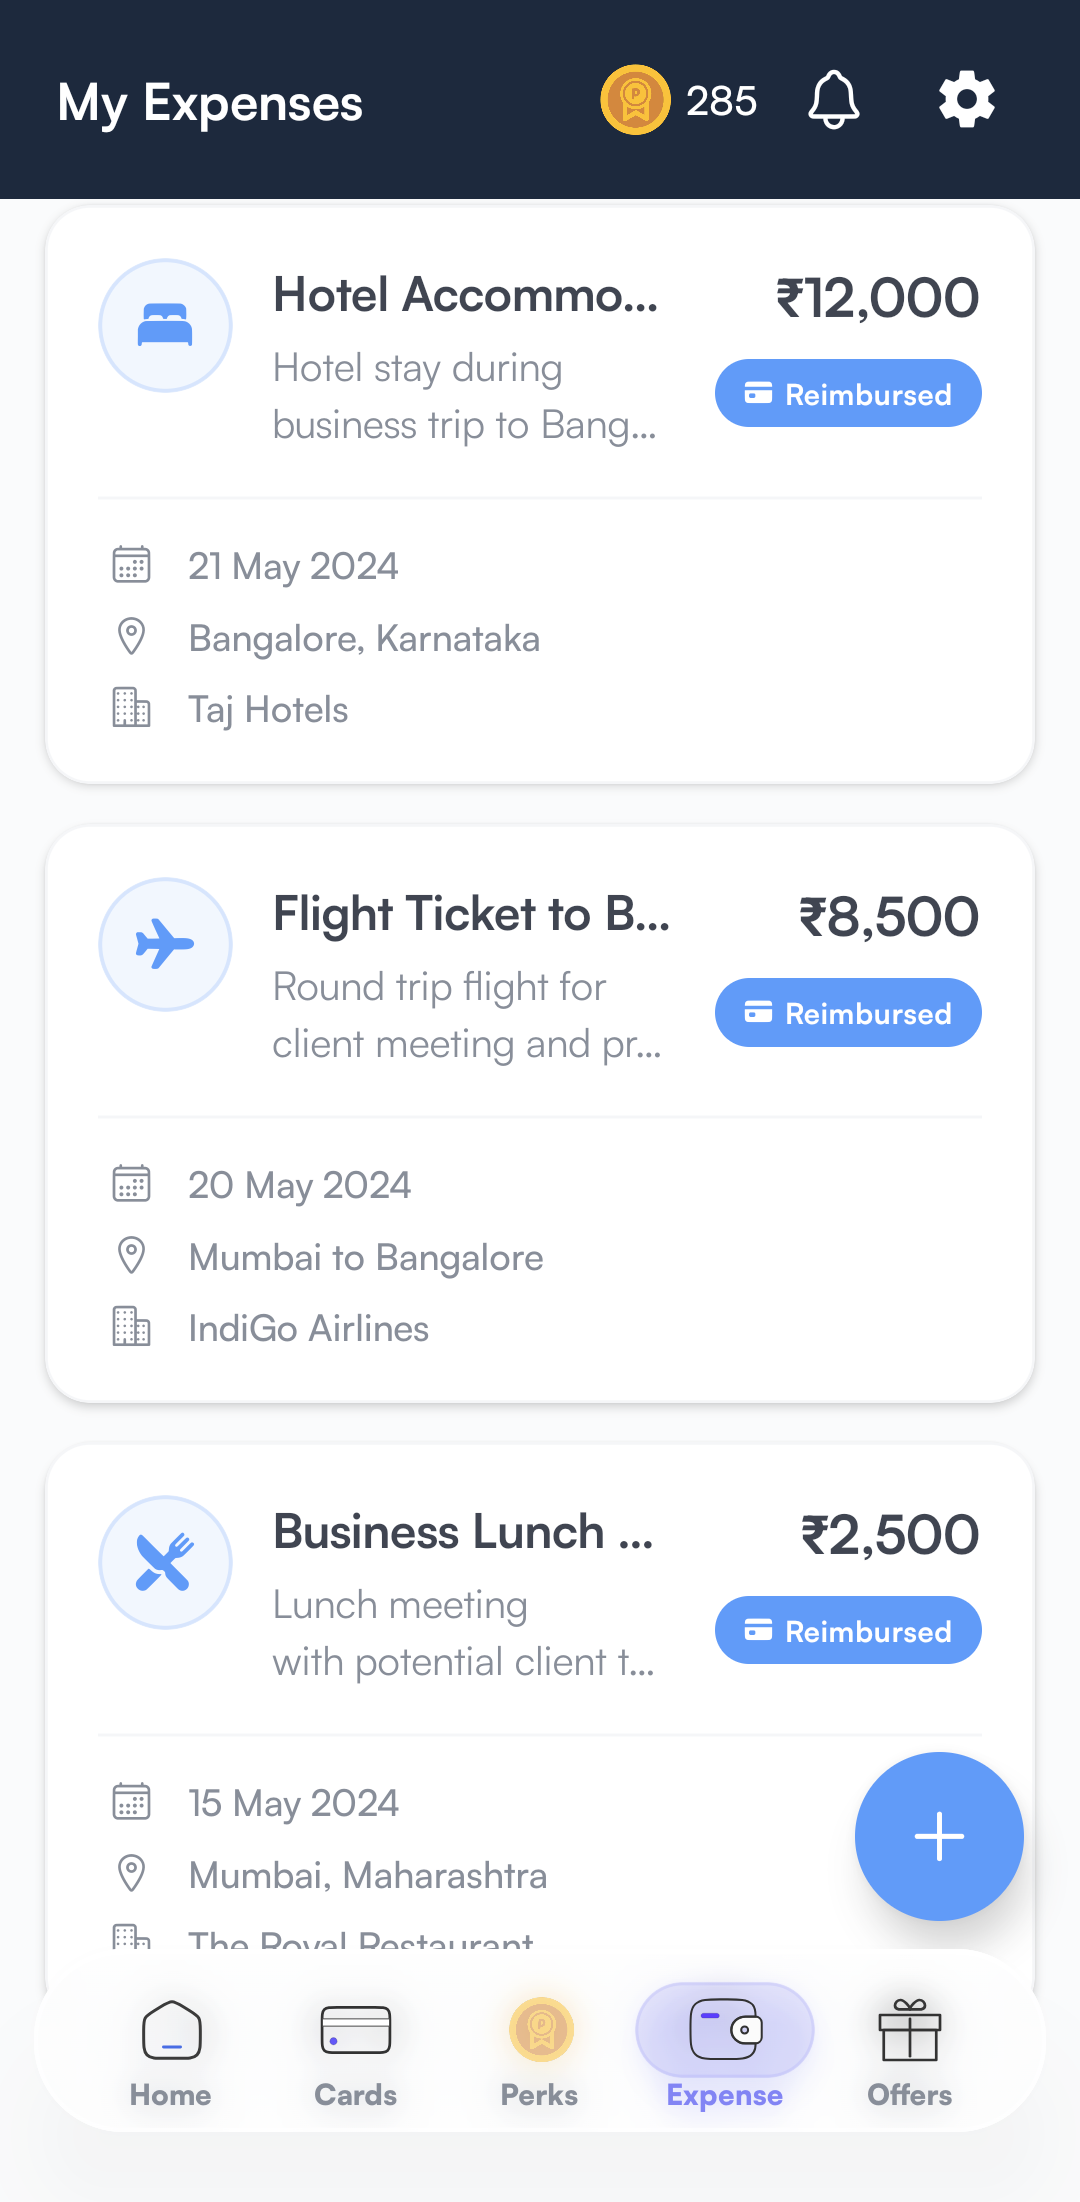
Tap the Expenses option from the bottom navigation bar.
-
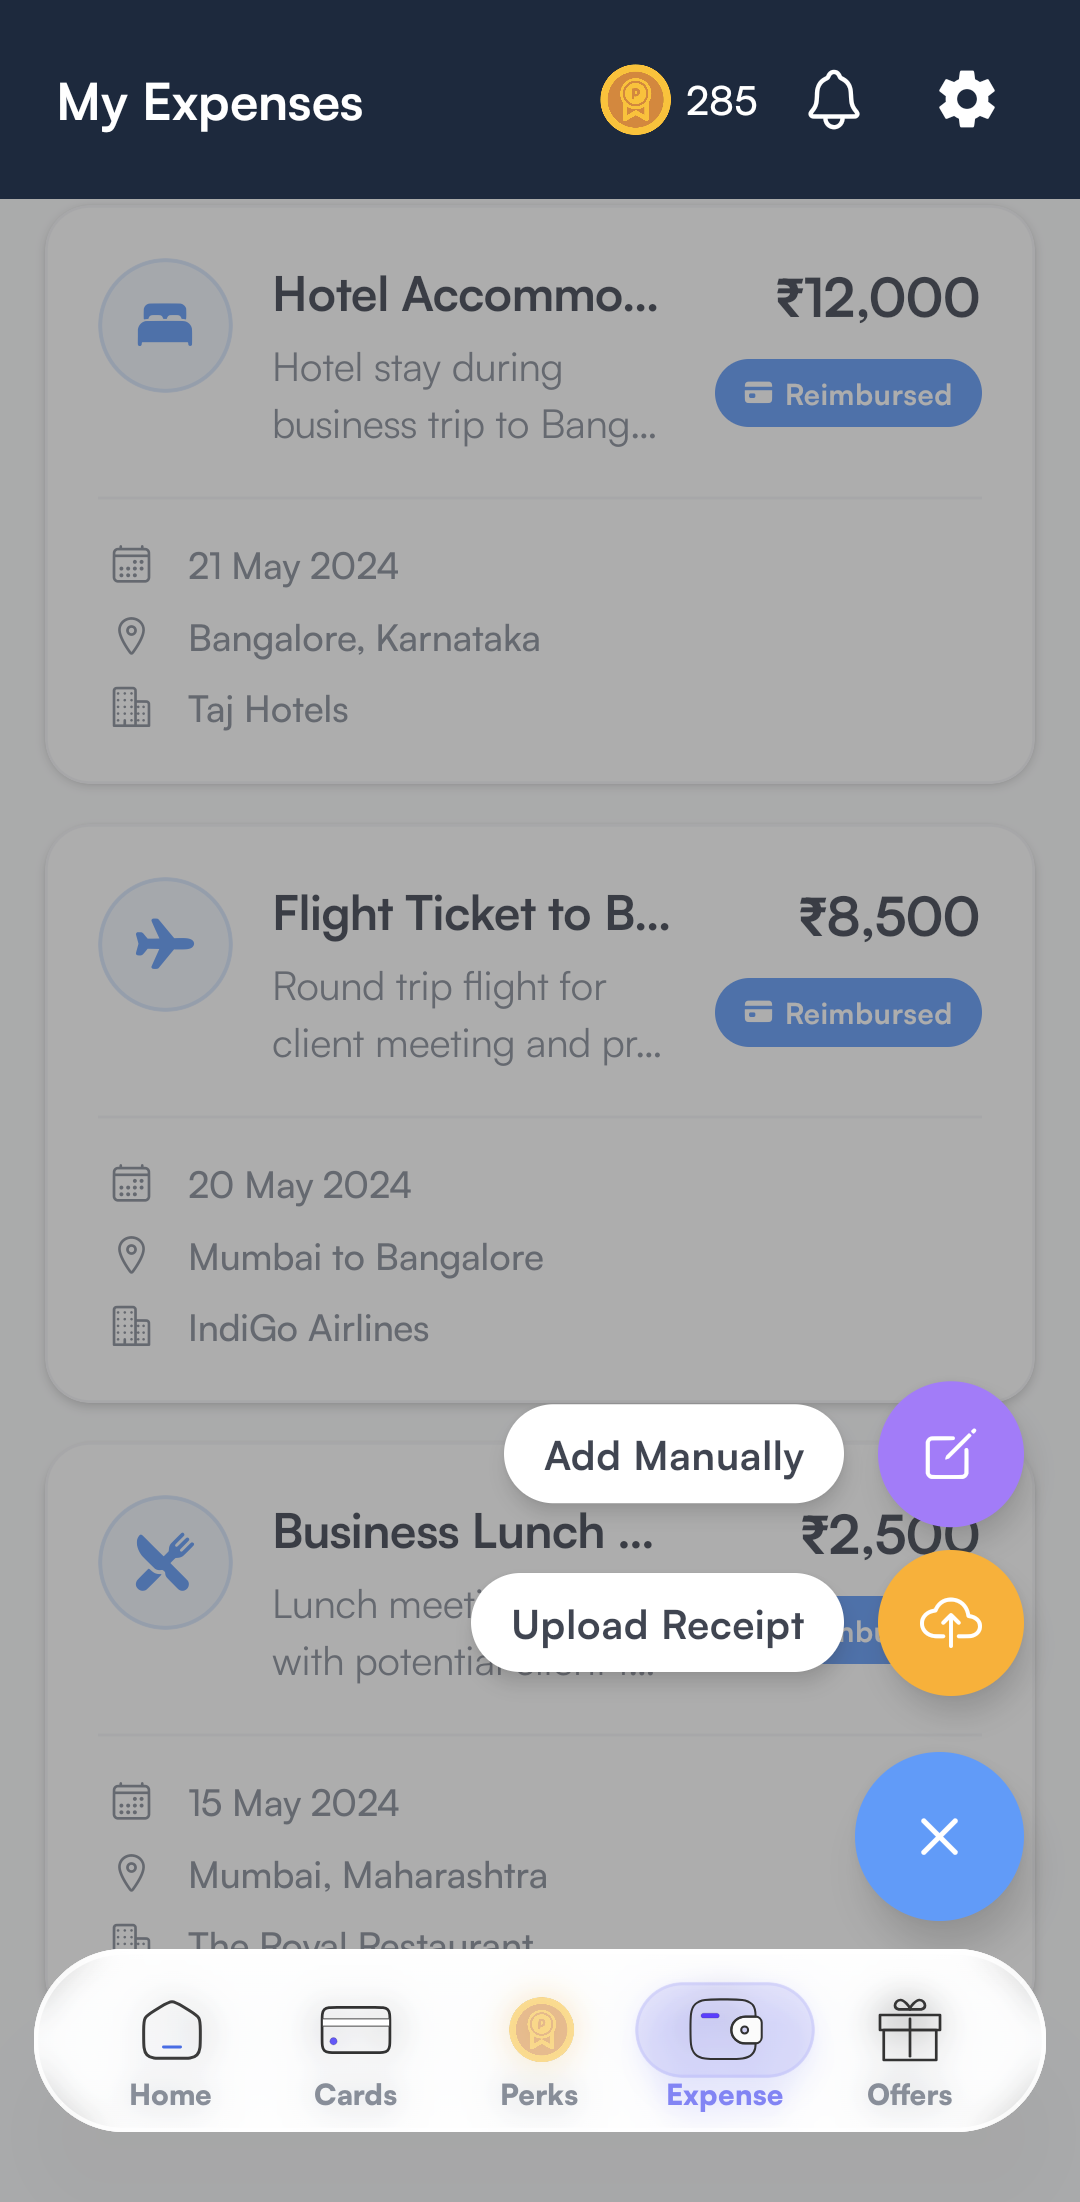
Tap

-
Select "Add manually" option.
-
This opens a new expense form.
- Fill in Basic Information
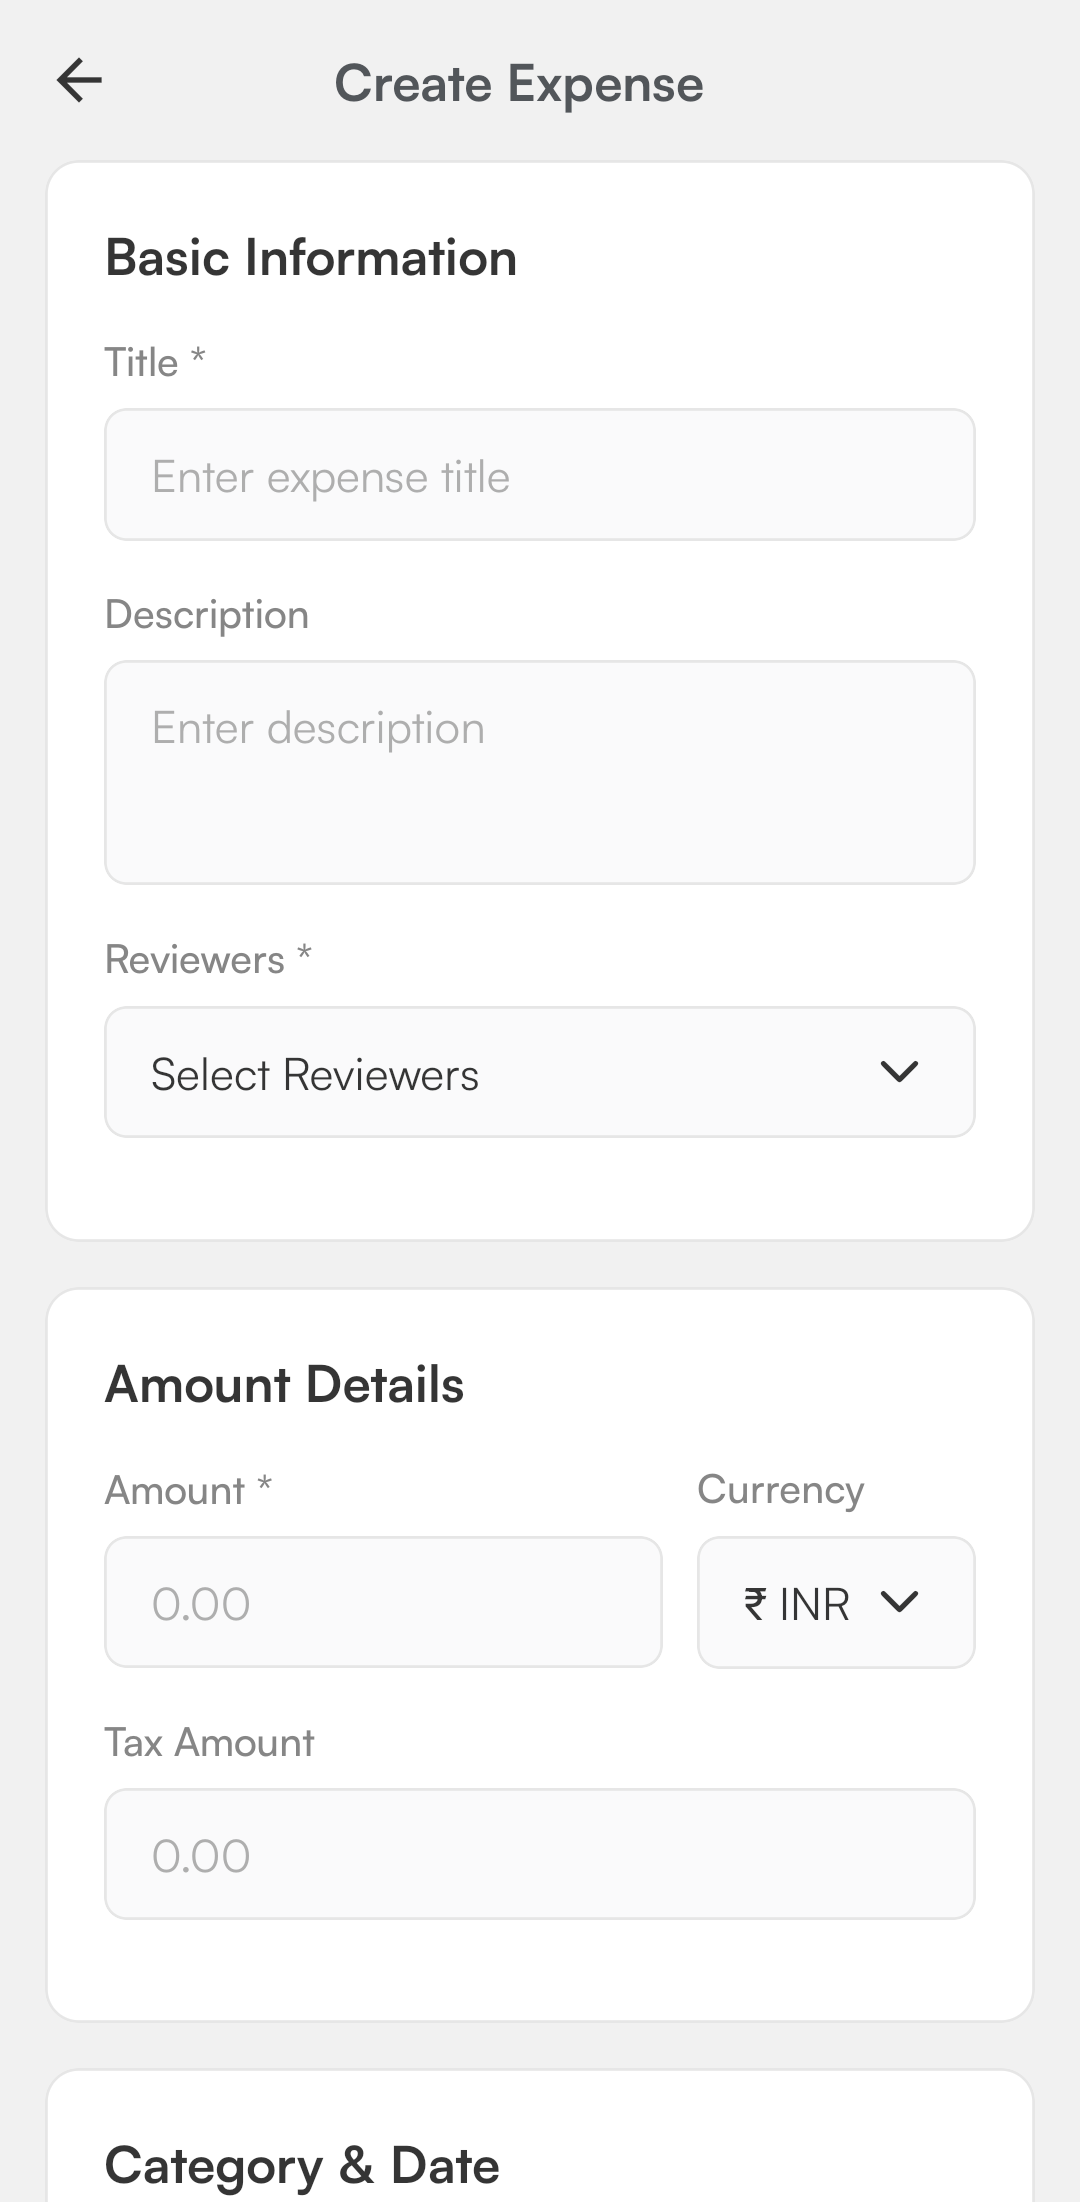
-
Expense Title - Enter the title of an expense
-
Description - Provide a short explanation of why the expense was incurred (e.g., “Taxi to airport for client meeting”).
-
Reviewers - Reviewers are individuals who verify the expense details before final approval.Choose the appropriate reviewer from the dropdown list. Typically, reviewers may include department heads, finance officers, or project managers depending on the expense type.
-
Amount - Enter the total expense amount. Make sure it matches the attached receipt.
-
Currency - Select the correct currency (useful for international expenses).
-
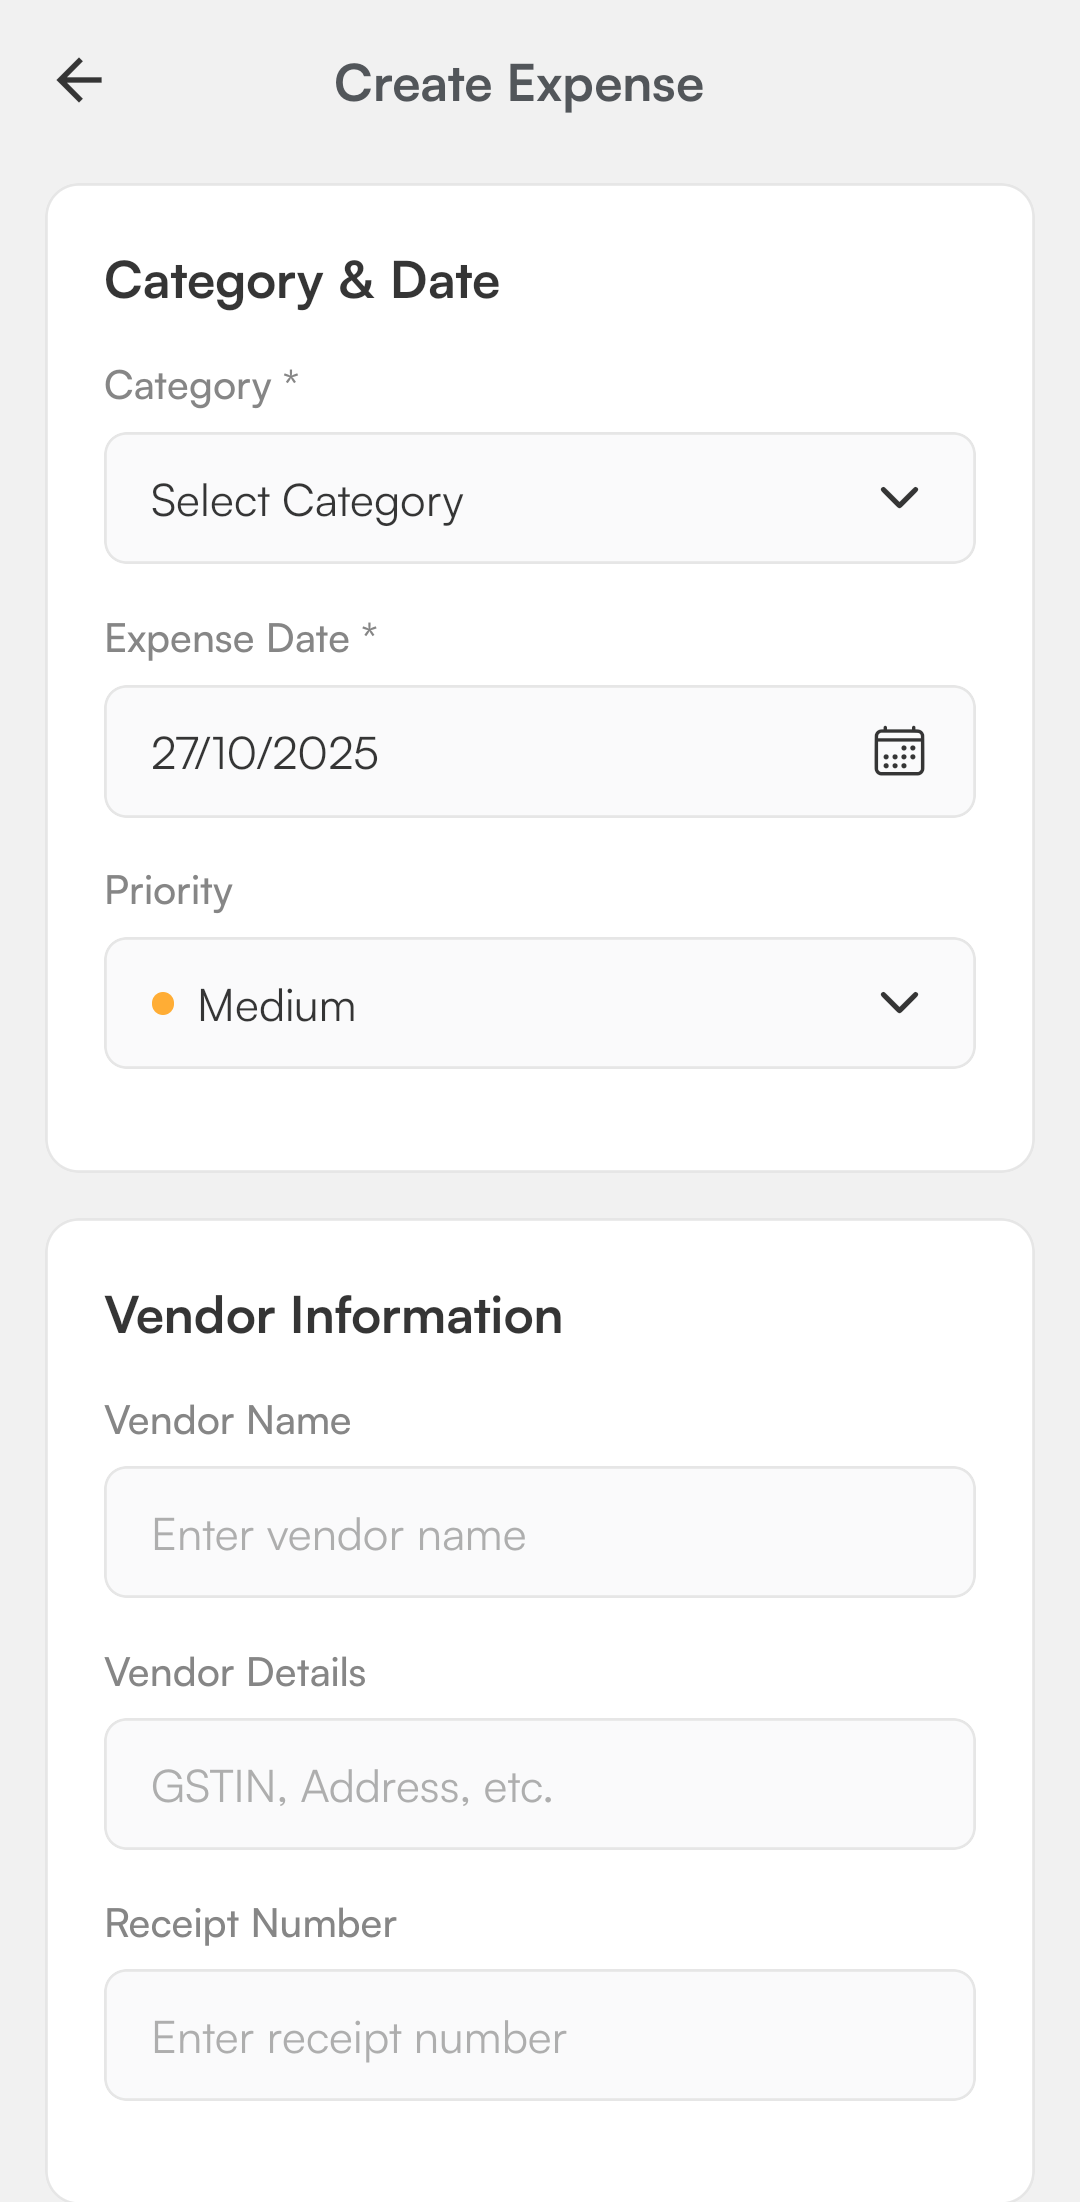
Date of Expense - The date when the expense actually occurred (must match the receipt or invoice).
-
Expense Type / Category - Choose the category that best describes the expense (e.g., Travel, Accommodation, Meals, Office Supplies, Miscellaneous).
-
Vendor / Payee Name - The individual, merchant, or service provider where the purchase was made.
-
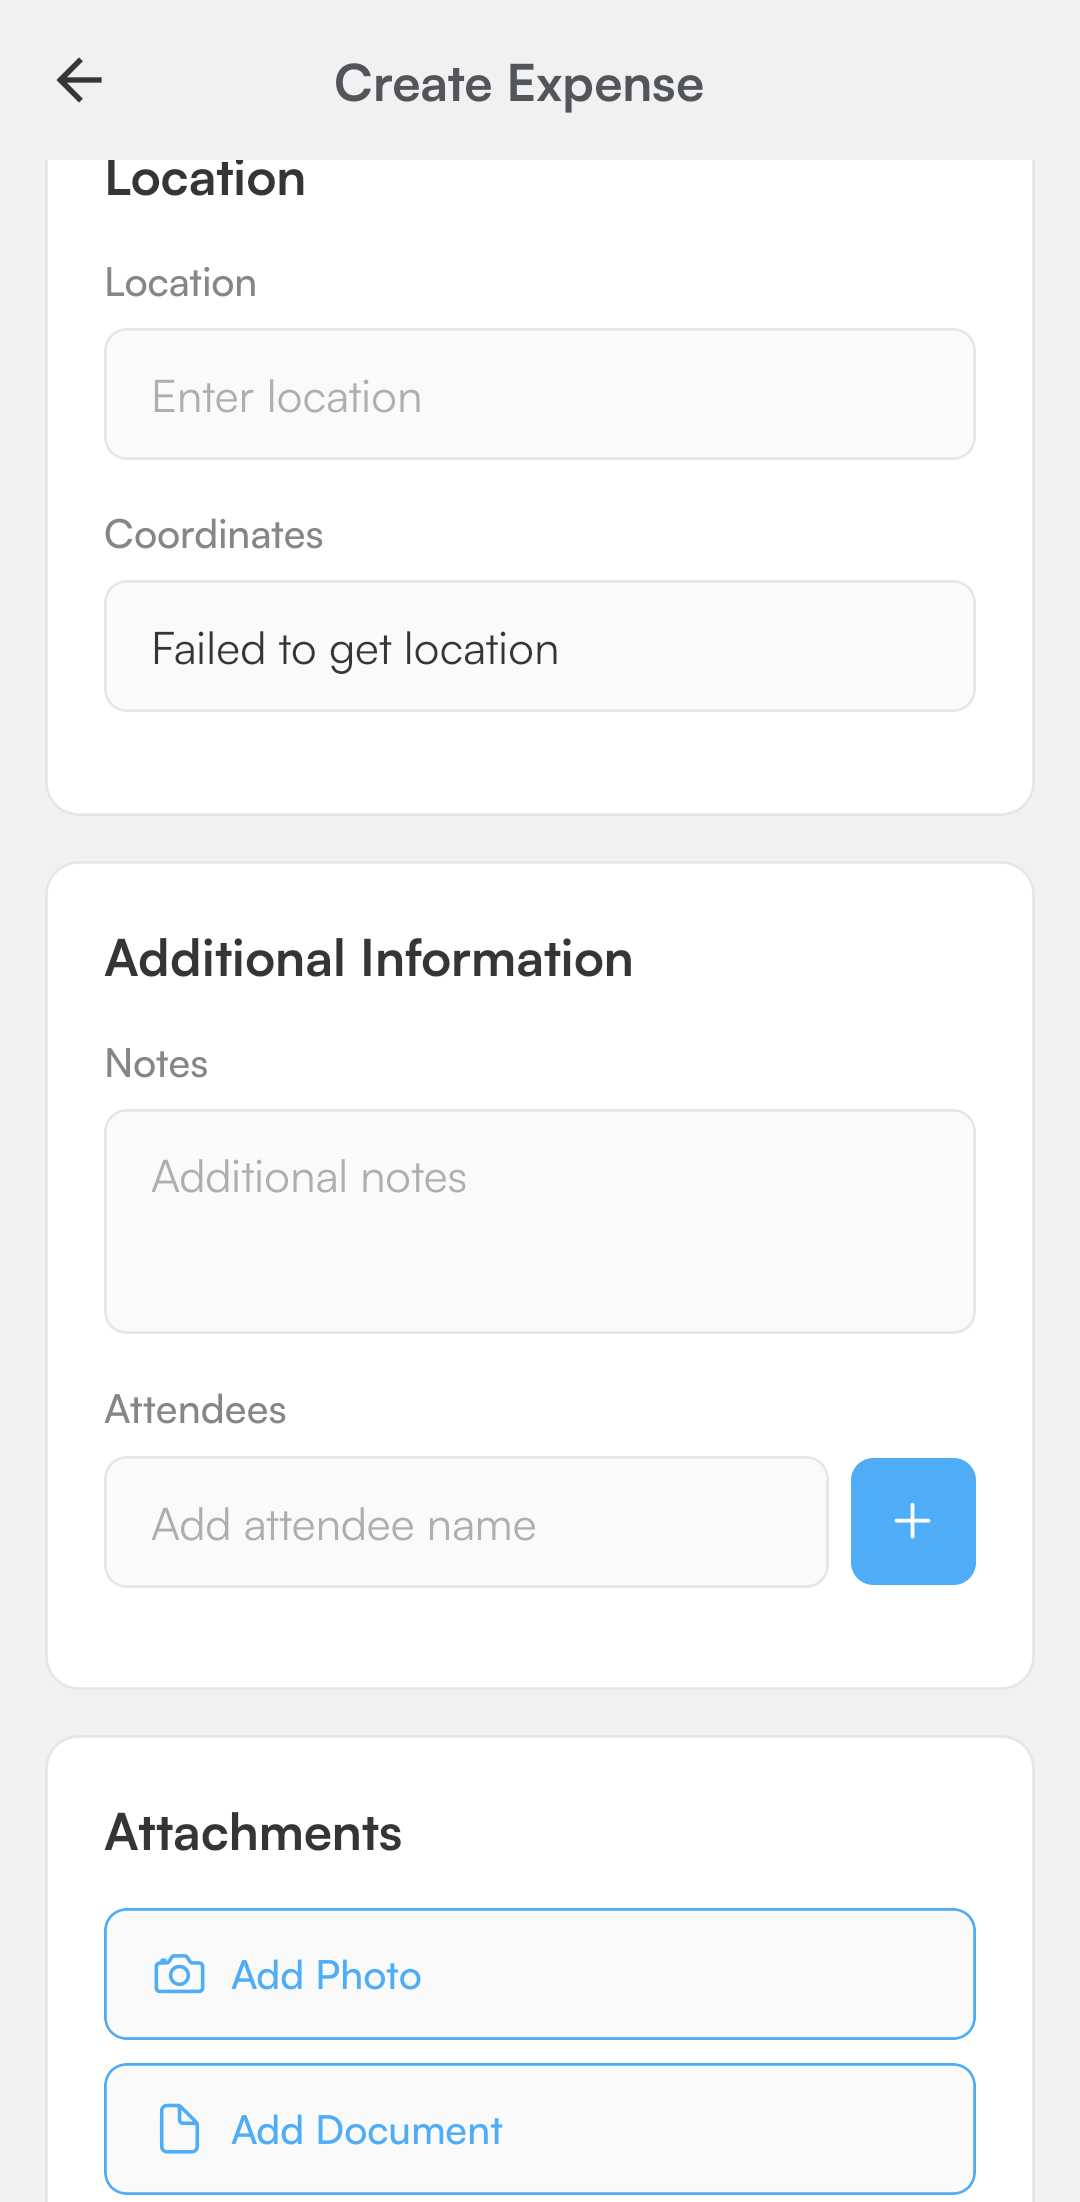
Location information - Location information specifies the place where the expense was incurred.
-
Additional information - This section captures any details not covered under Basic Information, Vendor Information, or Attachments but necessary for clarity or compliance. (e.g., any explanations or special instructions related to the expense).
-
Attachments - Attachments are supporting documents such as receipts, invoices, or travel tickets that validate the expense claim.
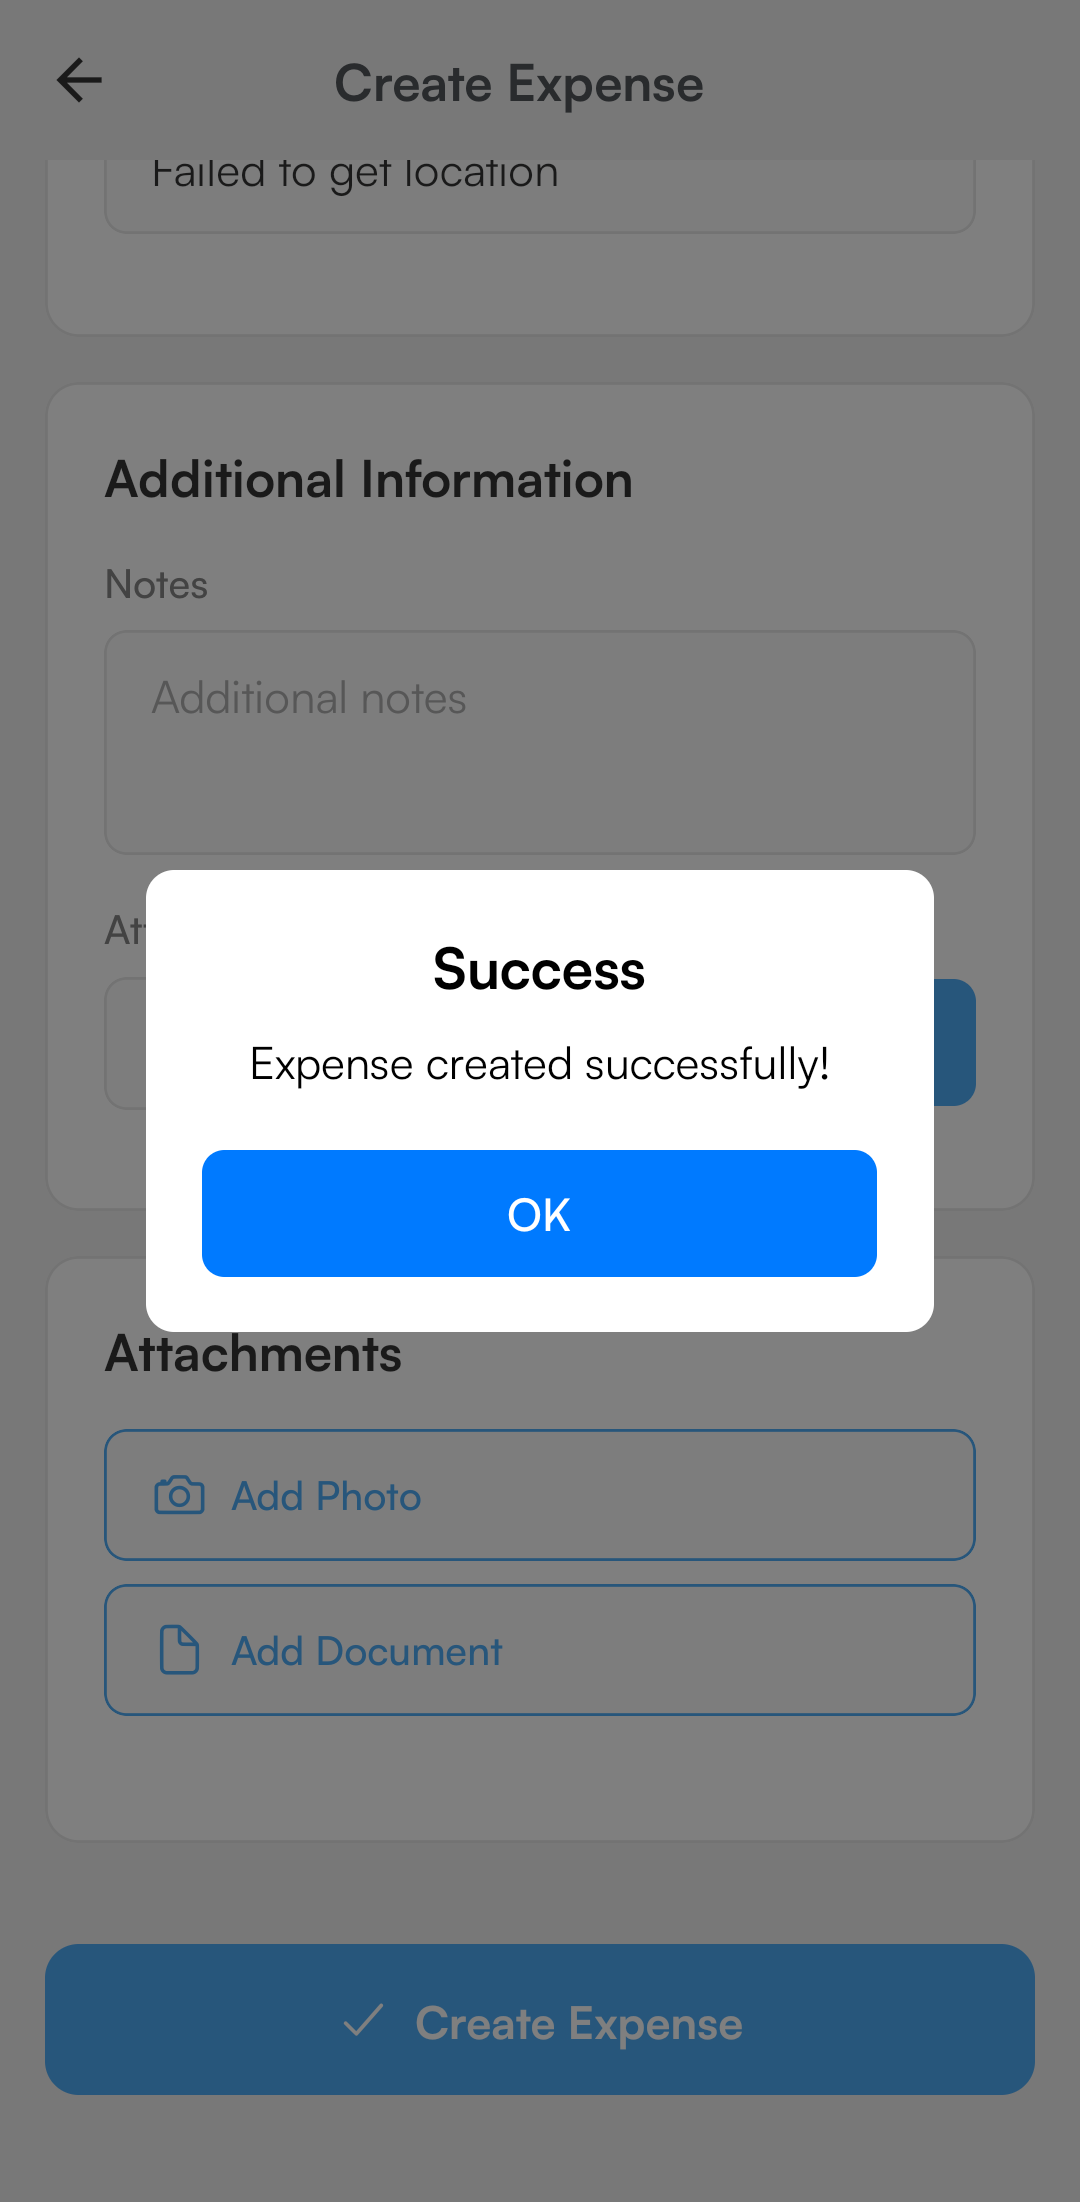
- Tap "Create expense" to save and submit the expense entry.